Installing a new toilet might seem like a daunting task, but with the right tools and guidance, it’s a project many homeowners can tackle themselves. Whether you’re replacing an old, inefficient model or installing a toilet in a new bathroom, this comprehensive guide will walk you through the process step-by-step. We’ll cover everything from removing the old toilet to securing the new one, ensuring a leak-free and properly functioning fixture. By following this DIY toilet installation guide, you can save money on plumbing costs and gain the satisfaction of completing a home improvement project on your own.
Why Should You Consider Installing a Toilet Yourself?
Installing a toilet yourself can be a rewarding experience for several reasons:
- Cost savings: DIY installation can save you the cost of hiring a professional plumber.
- Skill development: You’ll learn valuable home improvement skills.
- Convenience: You can complete the project on your own schedule.
- Customization: You have full control over the toilet selection and installation process.
While toilet installation isn’t overly complex, it does require some physical effort and basic plumbing knowledge. If you’re comfortable with home improvement projects and have the necessary tools, you can likely handle this task. However, if you encounter any complications or feel unsure at any point, don’t hesitate to consult a professional plumber.Learn more about when to DIY or hire a professional for bathroom projects
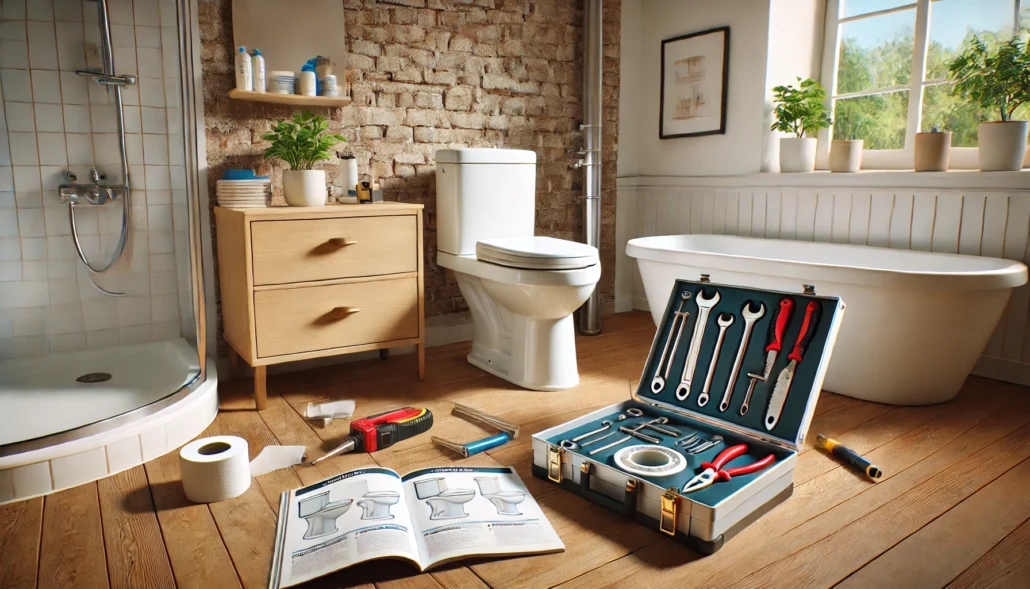
What Tools and Materials Do You Need for Toilet Installation?
Before you begin, gather the following tools and materials:
- New toilet (including tank, bowl, and seat)
- Wax ring or wax-free seal
- Toilet supply line
- Adjustable wrench
- Screwdriver
- Putty knife
- Hacksaw (if needed to remove old bolts)
- Level
- Plumber’s tape
- Caulk and caulk gun
- Rags or towels
- Bucket
Having all these items ready before you start will make the installation process smoother and more efficient.
How Do You Remove the Old Toilet?
Removing the old toilet is the first step in the installation process. Here’s how to do it:
- Turn off the water supply to the toilet and flush to empty the tank.
- Disconnect the water supply line from the tank.
- Remove the tank lid and set it aside safely.
- Unscrew the nuts at the base of the toilet bowl.
- Gently rock the toilet to break the wax seal and lift it off the floor.
- Remove the old wax ring and clean the flange area thoroughly.
Remember to stuff a rag into the drain hole to prevent sewer gases from escaping and to keep tools from falling in.
What’s the Proper Way to Prepare the Toilet Flange?
The toilet flange is crucial for a secure and leak-free installation. Here’s how to prepare it:
- Inspect the flange for damage. If it’s cracked or broken, replace it before proceeding.
- Ensure the flange is level with the finished floor. Use a flange extender if needed.
- Clean the surface thoroughly, removing any old wax or debris.
- Check that the closet bolts are secure and properly positioned.
A well-prepared flange will provide a solid foundation for your new toilet, preventing future leaks and wobbling.Discover more about maintaining your bathroom plumbing
How Do You Install The New Toilet Bowl?
Installing the new toilet bowl is a critical step. Follow these instructions:
- Place the new wax ring on the flange, ensuring it’s centered.
- Carefully lower the toilet bowl onto the flange, aligning it with the closet bolts.
- Press down firmly to compress the wax ring and create a seal.
- Secure the toilet to the floor using nuts on the closet bolts. Tighten alternately until the toilet is level and stable.
- Be careful not to overtighten, as this can crack the porcelain.
Use a level to ensure the toilet is perfectly horizontal. A properly installed bowl is essential for comfort and prevents leaks.
What’s the Best Way to Attach the Tank to the Bowl?
Attaching the tank to the bowl requires precision to prevent leaks. Here’s the process:
- Place the rubber gasket on the underside of the tank, around the flush valve opening.
- Lower the tank onto the bowl, aligning the bolts with the holes in the bowl.
- Secure the tank bolts from inside the tank, using washers and nuts underneath the bowl.
- Tighten the bolts evenly, alternating between them to ensure a level fit.
- Check for leaks by filling the tank and flushing several times.
A properly attached tank should be stable and leak-free. If you notice any wobbling or water seepage, recheck your connections.
How Do You Connect the Water Supply to the New Toilet?
Connecting the water supply is the final major step in toilet installation:
- Attach the fill valve to the tank if it’s not pre-installed.
- Connect the new supply line to the fill valve and the shut-off valve on the wall.
- Use plumber’s tape on the threaded connections to ensure a watertight seal.
- Turn on the water supply slowly and check for leaks.
- Adjust the fill valve if necessary to achieve the proper water level in the tank.
Proper water connection is crucial for the toilet’s functionality and preventing water waste.Explore water-saving bathroom fixtures

What Are Some Common Toilet Installation Mistakes to Avoid?
Even experienced DIYers can make mistakes during toilet installation. Here are some common pitfalls to avoid:
- Forgetting to install the wax ring or installing it upside down.
- Overtightening bolts, which can crack the porcelain.
- Not checking for level installation, leading to rocking toilets.
- Failing to properly clean the flange area before installation.
- Incorrectly sizing the supply line or wax ring.
- Not testing for leaks thoroughly after installation.
By being aware of these potential issues, you can ensure a smoother installation process and a properly functioning toilet.
How Do You Troubleshoot Leaks After Installation?
If you notice leaks after installing your new toilet, don’t panic. Here’s how to troubleshoot:
- Check the water supply connections and tighten if necessary.
- Ensure the tank bolts are properly tightened and the tank-to-bowl gasket is seated correctly.
- Verify that the wax ring is creating a proper seal between the toilet and the flange.
- Look for cracks in the porcelain, which may indicate overtightening or mishandling during installation.
- If leaks persist, consider removing the toilet and starting over with a new wax ring.
Remember, a small leak can lead to significant water damage over time, so it’s crucial to address any issues promptly.
What Final Touches Should You Add to Complete the Installation?
After the main installation is complete, add these finishing touches:
- Install the toilet seat according to the manufacturer’s instructions.
- Apply a bead of caulk around the base of the toilet, leaving a small gap at the back to detect potential leaks.
- Clean up any mess and dispose of the old toilet and packaging materials properly.
- Consider adding toilet accessories like a bidet attachment or toilet paper holder.
These final steps will ensure your new toilet is not only functional but also aesthetically pleasing and fully integrated into your bathroom.Find stylish bathroom accessories to complement your new toilet
When Should You Call a Professional Plumber?
While many homeowners can successfully install a toilet, there are situations where professional help is advisable:
- If you encounter unexpected plumbing issues during removal of the old toilet.
- When dealing with non-standard plumbing configurations or tight spaces.
- If you’re not confident in your ability to create a watertight seal.
- When local building codes require professional installation for warranty or insurance purposes.
- If you experience persistent leaks or other issues after DIY installation.
Don’t hesitate to call a plumber if you feel overwhelmed or encounter problems you can’t resolve. It’s better to ensure proper installation than to risk water damage or ongoing issues.In conclusion, installing a toilet can be a manageable DIY project for many homeowners. By following this guide and taking your time with each step, you can successfully install a new toilet and enjoy the satisfaction of completing a significant home improvement task.Key points to remember:
- Gather all necessary tools and materials before starting
- Turn off the water supply and remove the old toilet carefully
- Properly prepare the toilet flange for a secure installation
- Install the new toilet bowl and tank, ensuring level placement and tight connections
- Connect the water supply and check thoroughly for leaks
- Avoid common mistakes like overtightening bolts or forgetting the wax ring
- Add finishing touches like caulking and installing the toilet seat
- Don’t hesitate to call a professional if you encounter difficulties
By keeping these points in mind, you’ll be well-equipped to tackle your toilet installation project with confidence.